So, you’ve discovered lead in your home or building. Now what? The idea of dealing with lead abatement might feel overwhelming, but don’t worry! You’re not alone in this. Understanding the process can make everything feel a whole lot more manageable.
This guide will walk you through the lead abatement process in a way that’s easy to understand. Whether you’re a homeowner, a landlord, or someone just looking to learn more, this is the place to start. Let’s get into it!
UNDERSTANDING LEAD ABATEMENT
Before diving into the details, let’s get clear on what lead abatement actually is. Essentially, lead abatement is the process of safely removing or containing lead-based paint and other lead hazards to prevent exposure. This is different from simple renovations or repairs because it follows strict guidelines designed to keep everyone safe.
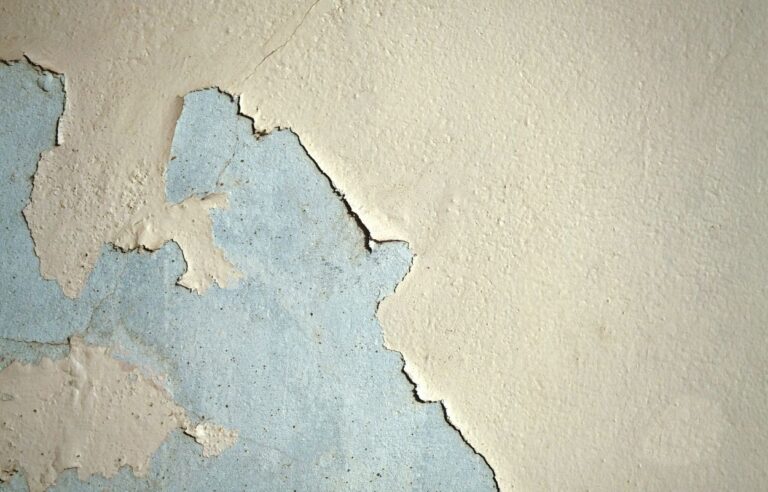
Lead was commonly used in paints and building materials before its risks became widely known. If your home was built before the late 1970s, there’s a good chance it could contain lead-based paint. The danger comes when this paint deteriorates, creating toxic dust and chips that can be harmful—especially to children and pregnant women.
WHEN DO YOU NEED LEAD ABATEMENT?
Not every old home automatically requires lead abatement. However, if lead-based paint is chipping, peeling, or present in high-friction areas like windows and doors, it’s time to take action. If you’re planning renovations that might disturb lead-painted surfaces, it’s also essential to deal with the lead first. Additionally, if an inspection confirms elevated lead levels in dust, soil, or water, abatement becomes necessary.
HIRING A CERTIFIED LEAD ABATEMENT PROFESSIONAL
Here’s the deal: lead abatement isn’t a DIY project. Certified professionals have the training, equipment, and know-how to safely remove or contain lead hazards without putting your health at risk. In fact, many places legally require you to hire a licensed contractor for lead abatement work.
When looking for a professional, make sure they are properly certified and experienced. Check reviews, ask for references, and get multiple quotes. This ensures you find someone who does the job right the first time.
INSPECTION AND TESTING
Before any work begins, the first step is a lead inspection. A trained inspector will assess your home to determine where lead is present and how serious the risk is. They may use methods like X-ray fluorescence (XRF) testing, paint chip sampling, and dust and soil analysis. Once they have a full picture of the lead hazards in your home, they’ll provide recommendations on how to proceed.
CHOOSING THE RIGHT LEAD ABATEMENT METHOD
Not all lead abatement methods involve completely removing lead. Depending on the situation, different strategies might be used, including encapsulation, which involves applying a special coating over lead-based paint to seal it in place. It’s a cost-effective solution but isn’t suitable for surfaces that are subject to wear and tear. Enclosure is another method that involves covering lead-painted surfaces with new materials, such as drywall or paneling, to prevent exposure. In some cases, removal is necessary, where professionals completely remove lead-based paint using specialized techniques like wet sanding or chemical stripping. Replacement is also an option, where lead-contaminated materials, such as old windows or doors, are completely removed and replaced. Your lead abatement professional will help determine the best approach based on your home’s condition and your budget.
THE LEAD ABATEMENT PROCESS
Once you’ve chosen a method, it’s time for the actual work to begin. Preparation comes first. The work area is sealed off to prevent contamination. Plastic sheeting is used to cover floors and furniture, and ventilation systems may be set up to minimize dust spread. After preparation, the removal or treatment phase takes place. The chosen abatement method is carried out carefully and under strict safety guidelines. Once the work is complete, cleanup begins. This is one of the most important steps. Specialized HEPA vacuums and wet-cleaning techniques are used to remove any remaining lead dust. After cleanup, final testing is done. Another round of testing ensures the area is safe. Only after clearance testing confirms lead levels are within acceptable limits can the space be used again.
STAYING SAFE DURING THE PROCESS
If you’re living in the home while abatement is happening, safety is key. In most cases, it’s best to relocate temporarily, especially if you have kids or pets. If staying put is necessary, avoid work areas completely, keep doors and vents sealed, and change clothes and shower immediately if exposed to lead dust. A reputable lead abatement team will take every precaution to minimize risks, but taking your own steps to stay safe is always a good idea.
COST CONSIDERATIONS
Lead abatement costs vary based on the size of the project, the method used, and local labor rates. On average, homeowners can expect to pay anywhere from a few hundred dollars for small projects to several thousand for more extensive work. While the cost may seem high, consider the long-term benefits. Lead exposure can cause severe health issues, especially in children. Investing in lead abatement now can prevent costly medical bills and property devaluation down the line.
LEAD ABATEMENT IN NANAIMO
For homeowners dealing with lead abatement in Nanaimo, it’s essential to work with certified local professionals. Nanaimo has specific regulations regarding lead safety, so hiring a contractor who understands local guidelines ensures everything is done correctly. Many companies in the area offer lead testing and abatement services. Getting an inspection from a qualified professional is the first step in making your home lead-free and safe for everyone.
PREVENTING FUTURE LEAD EXPOSURE
Once your home has undergone lead abatement, keeping it lead-safe is just as important. Regularly check painted surfaces for wear and tear. Clean floors and surfaces with a damp cloth or mop to prevent lead dust buildup. Wash children’s hands, toys, and pacifiers frequently. Use proper precautions if doing any home renovations. Being proactive can help ensure your home remains safe for years to come.
FINAL THOUGHTS
Lead abatement might seem like a big undertaking, but with the right knowledge and help, it’s completely manageable. By hiring certified professionals, following proper safety measures, and staying informed, you can navigate the process with confidence. If you need lead abatement in Nanaimo, don’t hesitate to reach out to local experts for guidance. Taking action now will create a safer environment for you and your loved ones. Need help getting started? Contact a local lead abatement professional today and take the first step toward a lead-free home!


